Configuring the Server in Windows Server 2012
Before you start
Before doing an installation, check that your server and client machines meet all the prerequisites for web server deployment, database server requirements and client requirements .
Oracle databases are not supported for vFire 9.9 and above.
To view a PDF version of the 9.11 prerequisites, select the following link  .
.
Select the appropriate link to view a PDF version of the 9.11 Prerequisites, the Installation Guide, or the Upgrade Guide .
To configure Windows Server 2012 for vFire Core, follow the instructions in this section.
If you are using Server 2016, follow the instructions in Configuring the Server in Windows Server 2016.
If you are using Server 2008, follow the instructions in Adding ASP.NET to Windows 2008 .
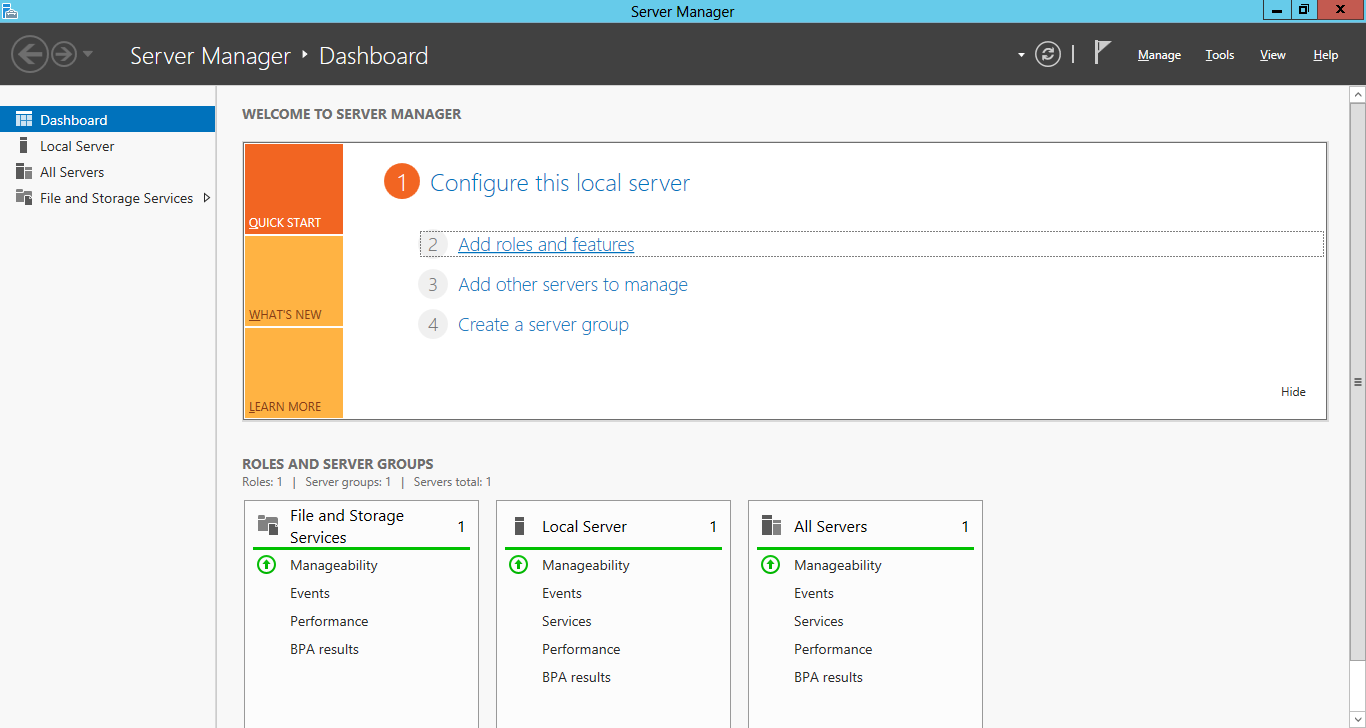
- Go to the Server Manager application, select Dashboard, and select the Add roles and features link.

-
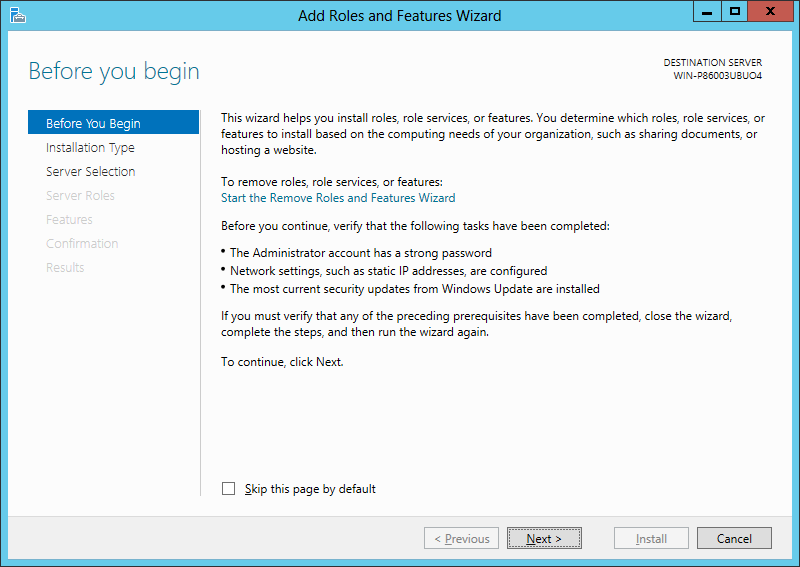
This will bring up the Add Roles and Features Wizard which opens on the Before You begin window. Read this page carefully and ensure that you have completed the tasks listed.

- Select Next to continue.
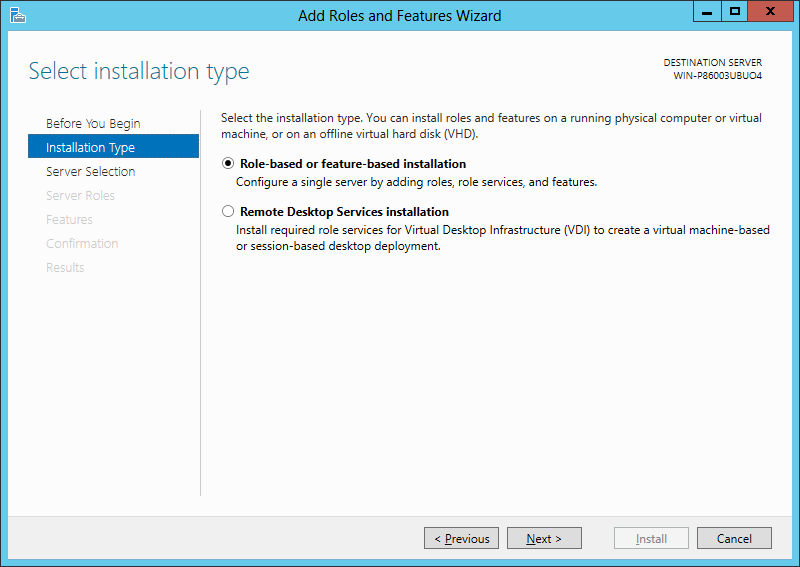
- On the Select installation type window, select Role-based or feature-based installation.

- Select Next to continue.
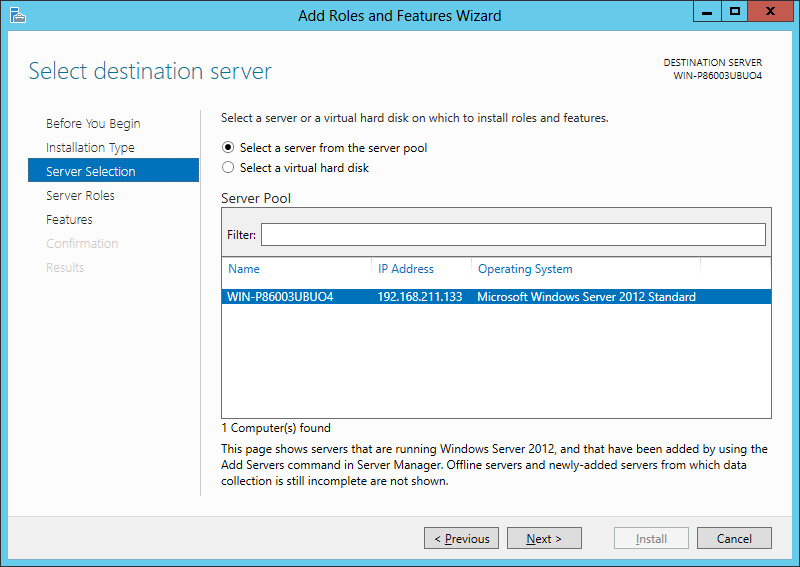
- On the Select destination server window, select the server that you will be using.

- Select Next to continue.
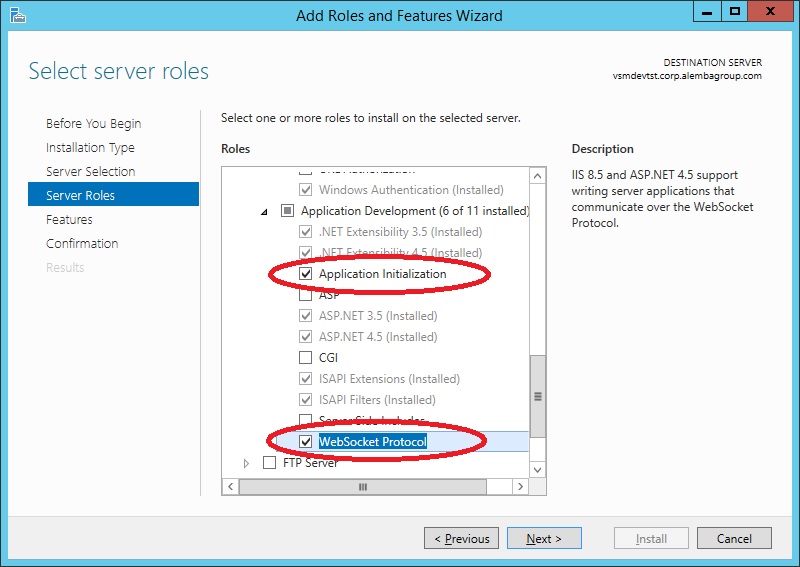
- In the Select server roles window, the Description field on the right side of the window gives you an explanation of the purpose of the different roles. Expand Web Server(IIS) and then the Web Server list.

- Within Application Development, select Application Initialization and WebSocket Protocol.

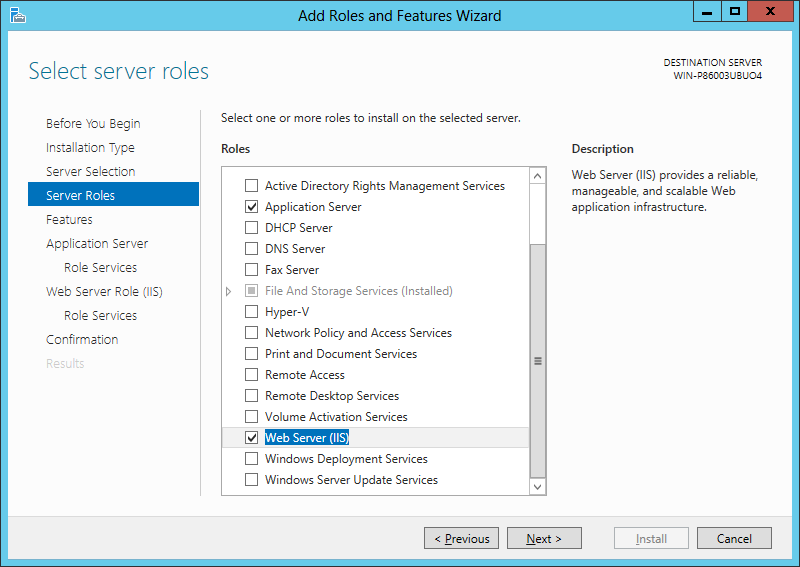
- Select Application Server and Web Server (IIS) as a minimum requirement.

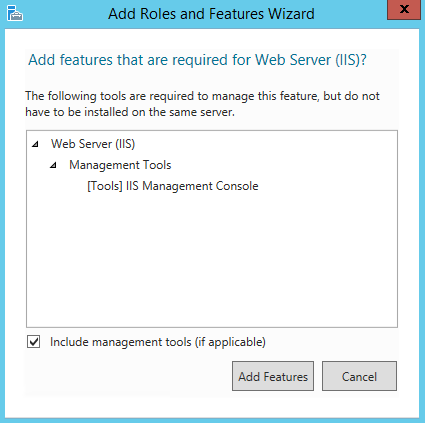
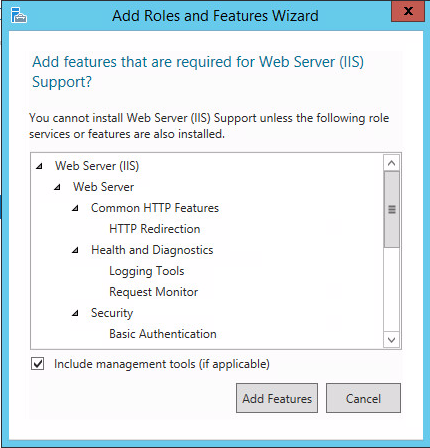
- When you select Web Server (IIS), the Add Roles and Features Wizard window is displayed, prompting you to add management tools.

- Select Add Features. The window closes and you are returned to the Select server roles window.
- Select Next to continue.
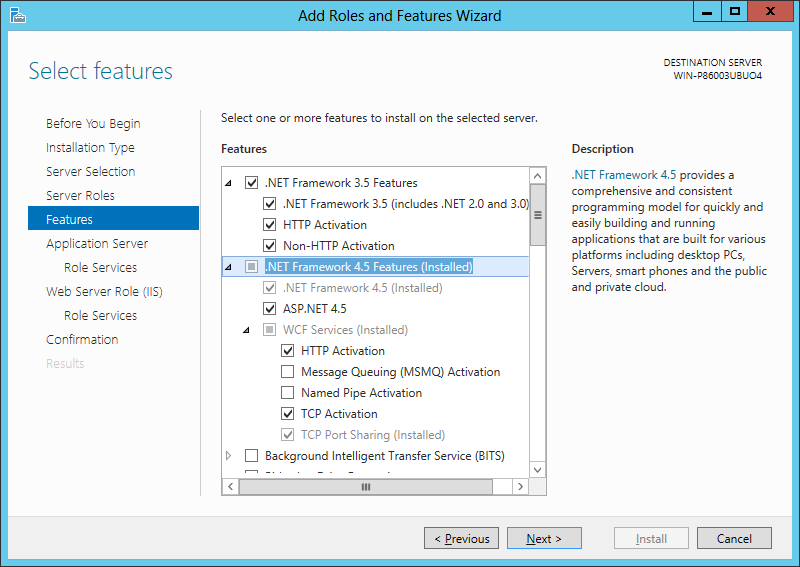
- In the Features window, ensure that the following options are selected.

- When you select HTTP Activation under .NET Framework, the Add Roles and Features Wizard window is displayed, prompting you to add further features.

- Select Add Features. The window closes and you are returned to the Select features window.
- Continue adding the features. When you select HTTP Activation beneath WCF Services, you will see the Add Roles and Features Wizard window again. Select Add Features to add the required features and return to the Select features window once more.
- Select Next to continue.
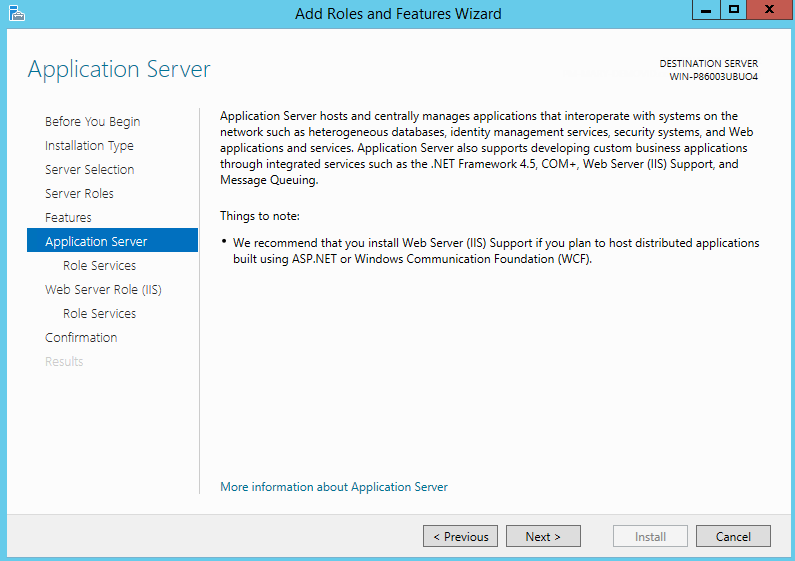
- The Application Server window is displayed, giving you information about the application server. Read through the details to ensure you are familiar with them.
- Select Next to continue.
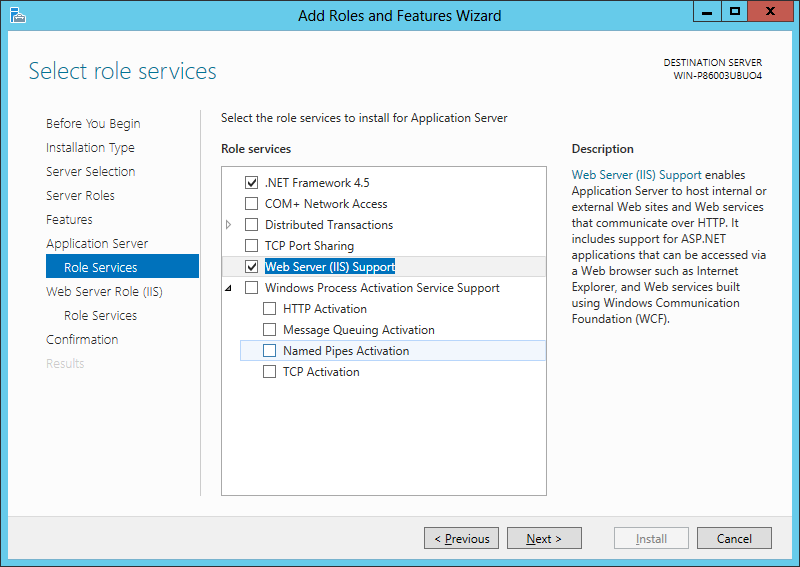
- In the Select role services window, select the following role services for the application server.

- When the Add Roles and Features window is displayed, add the features.

- Select Next to continue.
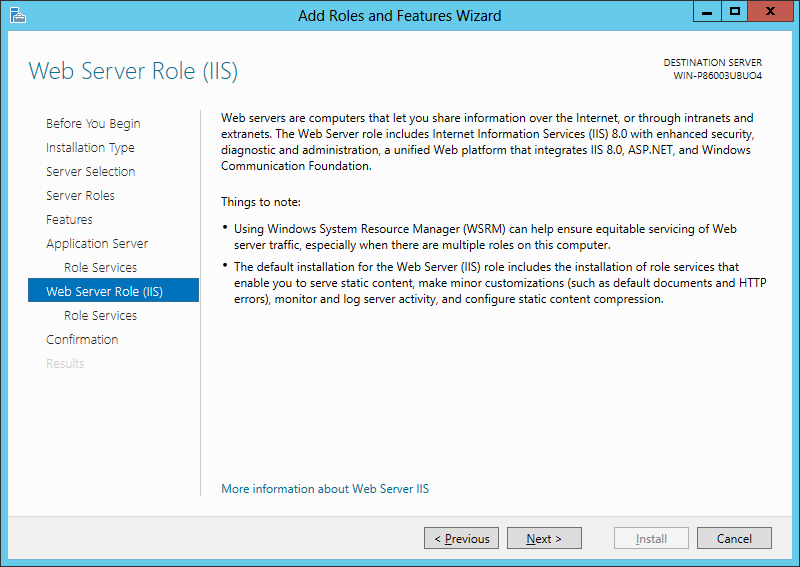
- In addition to role services for the Application Server, you will need to select Role Services for the Web Server Role (IIS). On the Web Server Role (IIS) window, read the information provided.

- Select Next to continue.
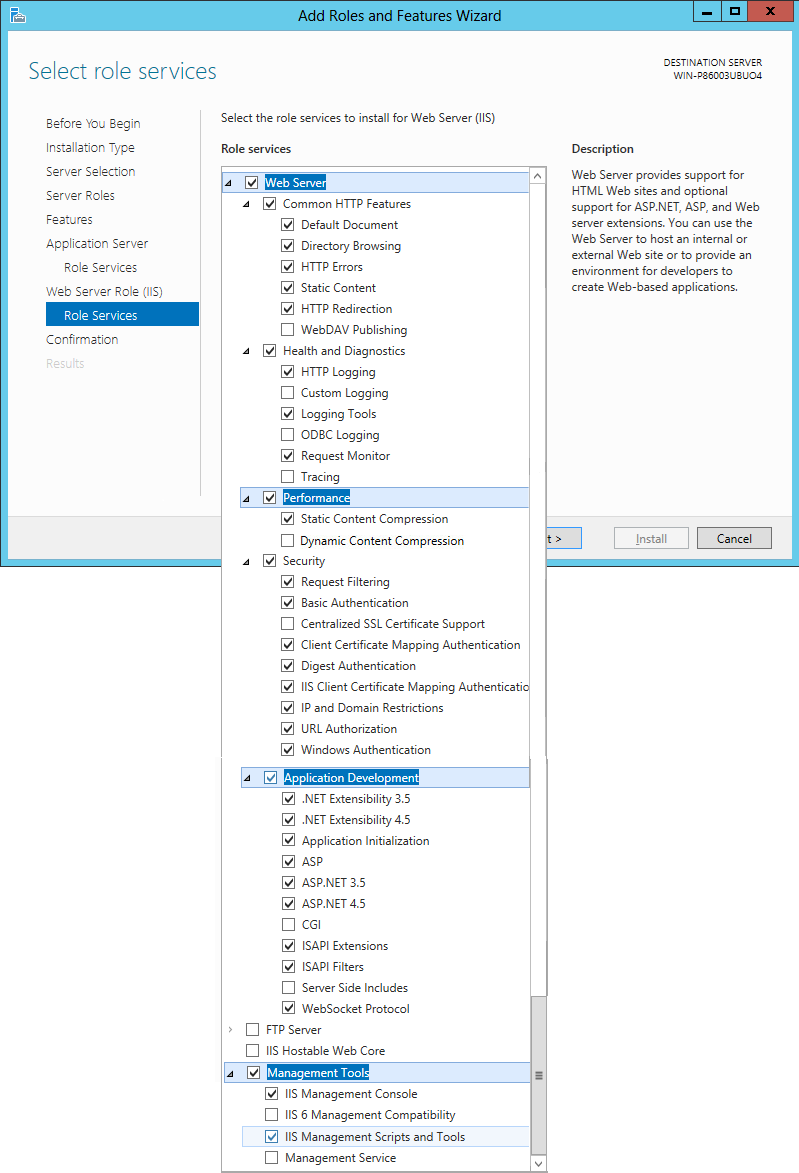
- On the Select role services window, ensure that all of the roles shown in the following screenshot are ticked.

- Select Next to continue.
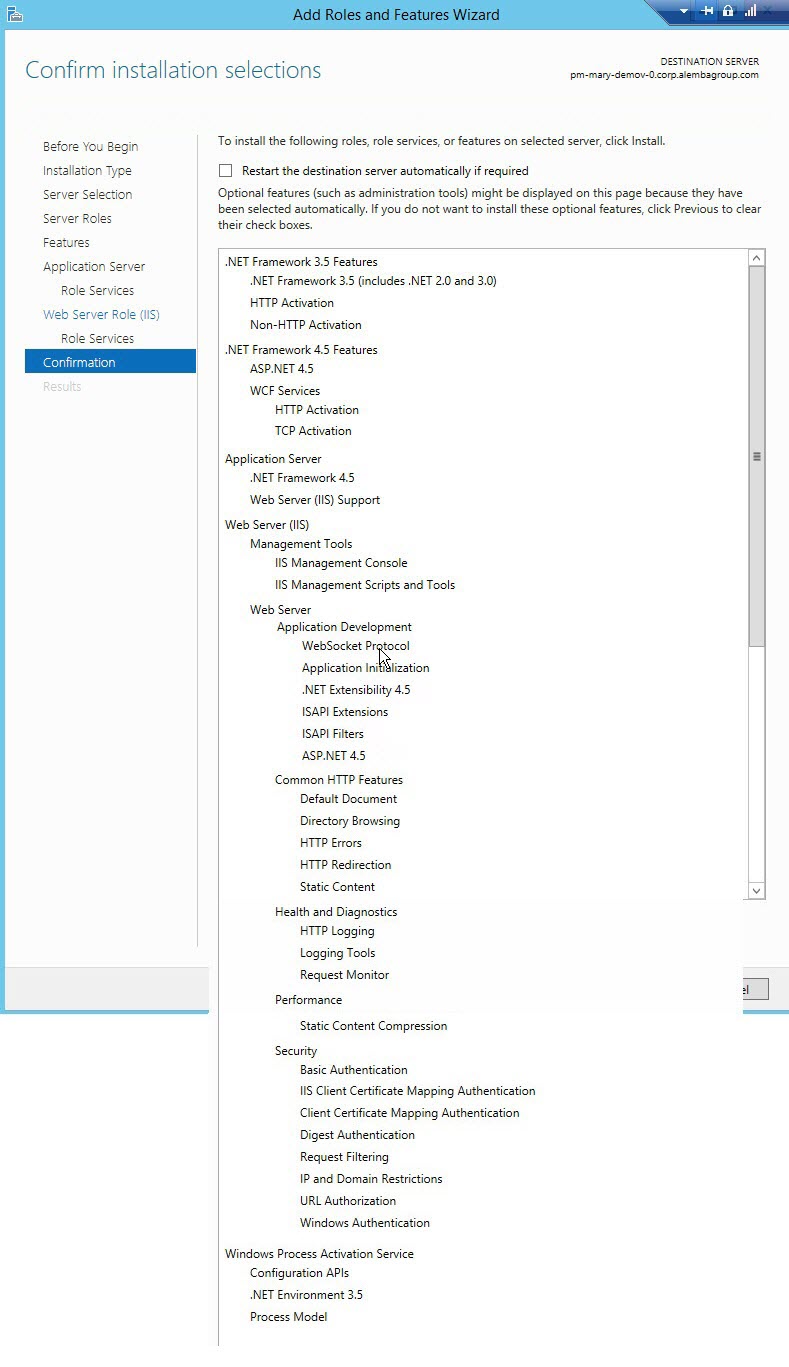
- In the Confirm installation selections window, confirm that you have the following selected. Scroll down to see the details.

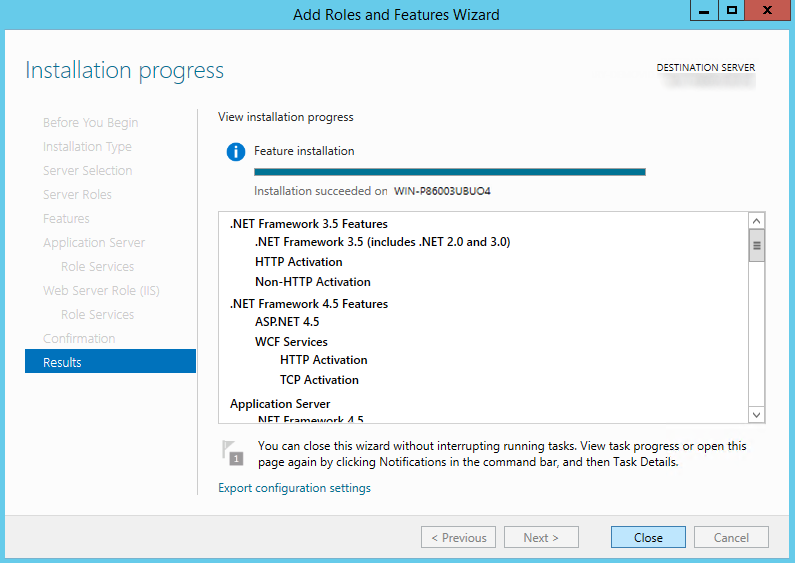
- Select Install when you are ready to proceed. When installation is complete, the results window will display all roles, role services and features which have been installed.

- Select Close to close the wizard. The configuration is complete.

These options will not be available if you are working in Windows 2008.

You may not see this window if you are upgrading.
vFire Core provides its own Dynamic Content Compression, which tests indicate performs slightly better than IIS Dynamic Content Compression. Disabling IIS Dynamic Content Compression is a viable option but not required.
Dynamic Content Compression is automatically enabled in IIS. When disabled, the Web Server (IIS) Support Role is also disabled, therefore, it is recommended you review the Role Services enabled by the Web Server (IIS) Support Role and manually re-enable those required for your environment.
What's Next
Once the configuration has been completed, the following components need to be installed:
- Microsoft .NET Framework v4.5.2 (offline installer - click here to download)
- Windows Management Framework 5.1 for Windows Server 2012 R2 (MSU file - click here to download)
The Full-Text and Semantic Extractions for Search is required for the Suggested Knowledge and Matching Panel features in v9.8. To install the feature on the SQL Server Database platform, you need access to the SQL Server Installer MSI. Installation instructions (via MS TechNet) are available via the following links:
- Install and Configure Semantic Search (SQL Server 2012)
- Install and Configure Semantic Search (SQL Server 2014)
- Install and Configure Semantic Search (SQL Server 2016 and later)
You also need to enable the feature within the system.